
Before you can use a panel or an inverter in a design, it needs to exist in your component list. You add these yourself, once, and then they are available in every project. This short guide shows how, and it is quick with a manufacturer’s spec sheet in front of you.
Step 1: Open the Components library
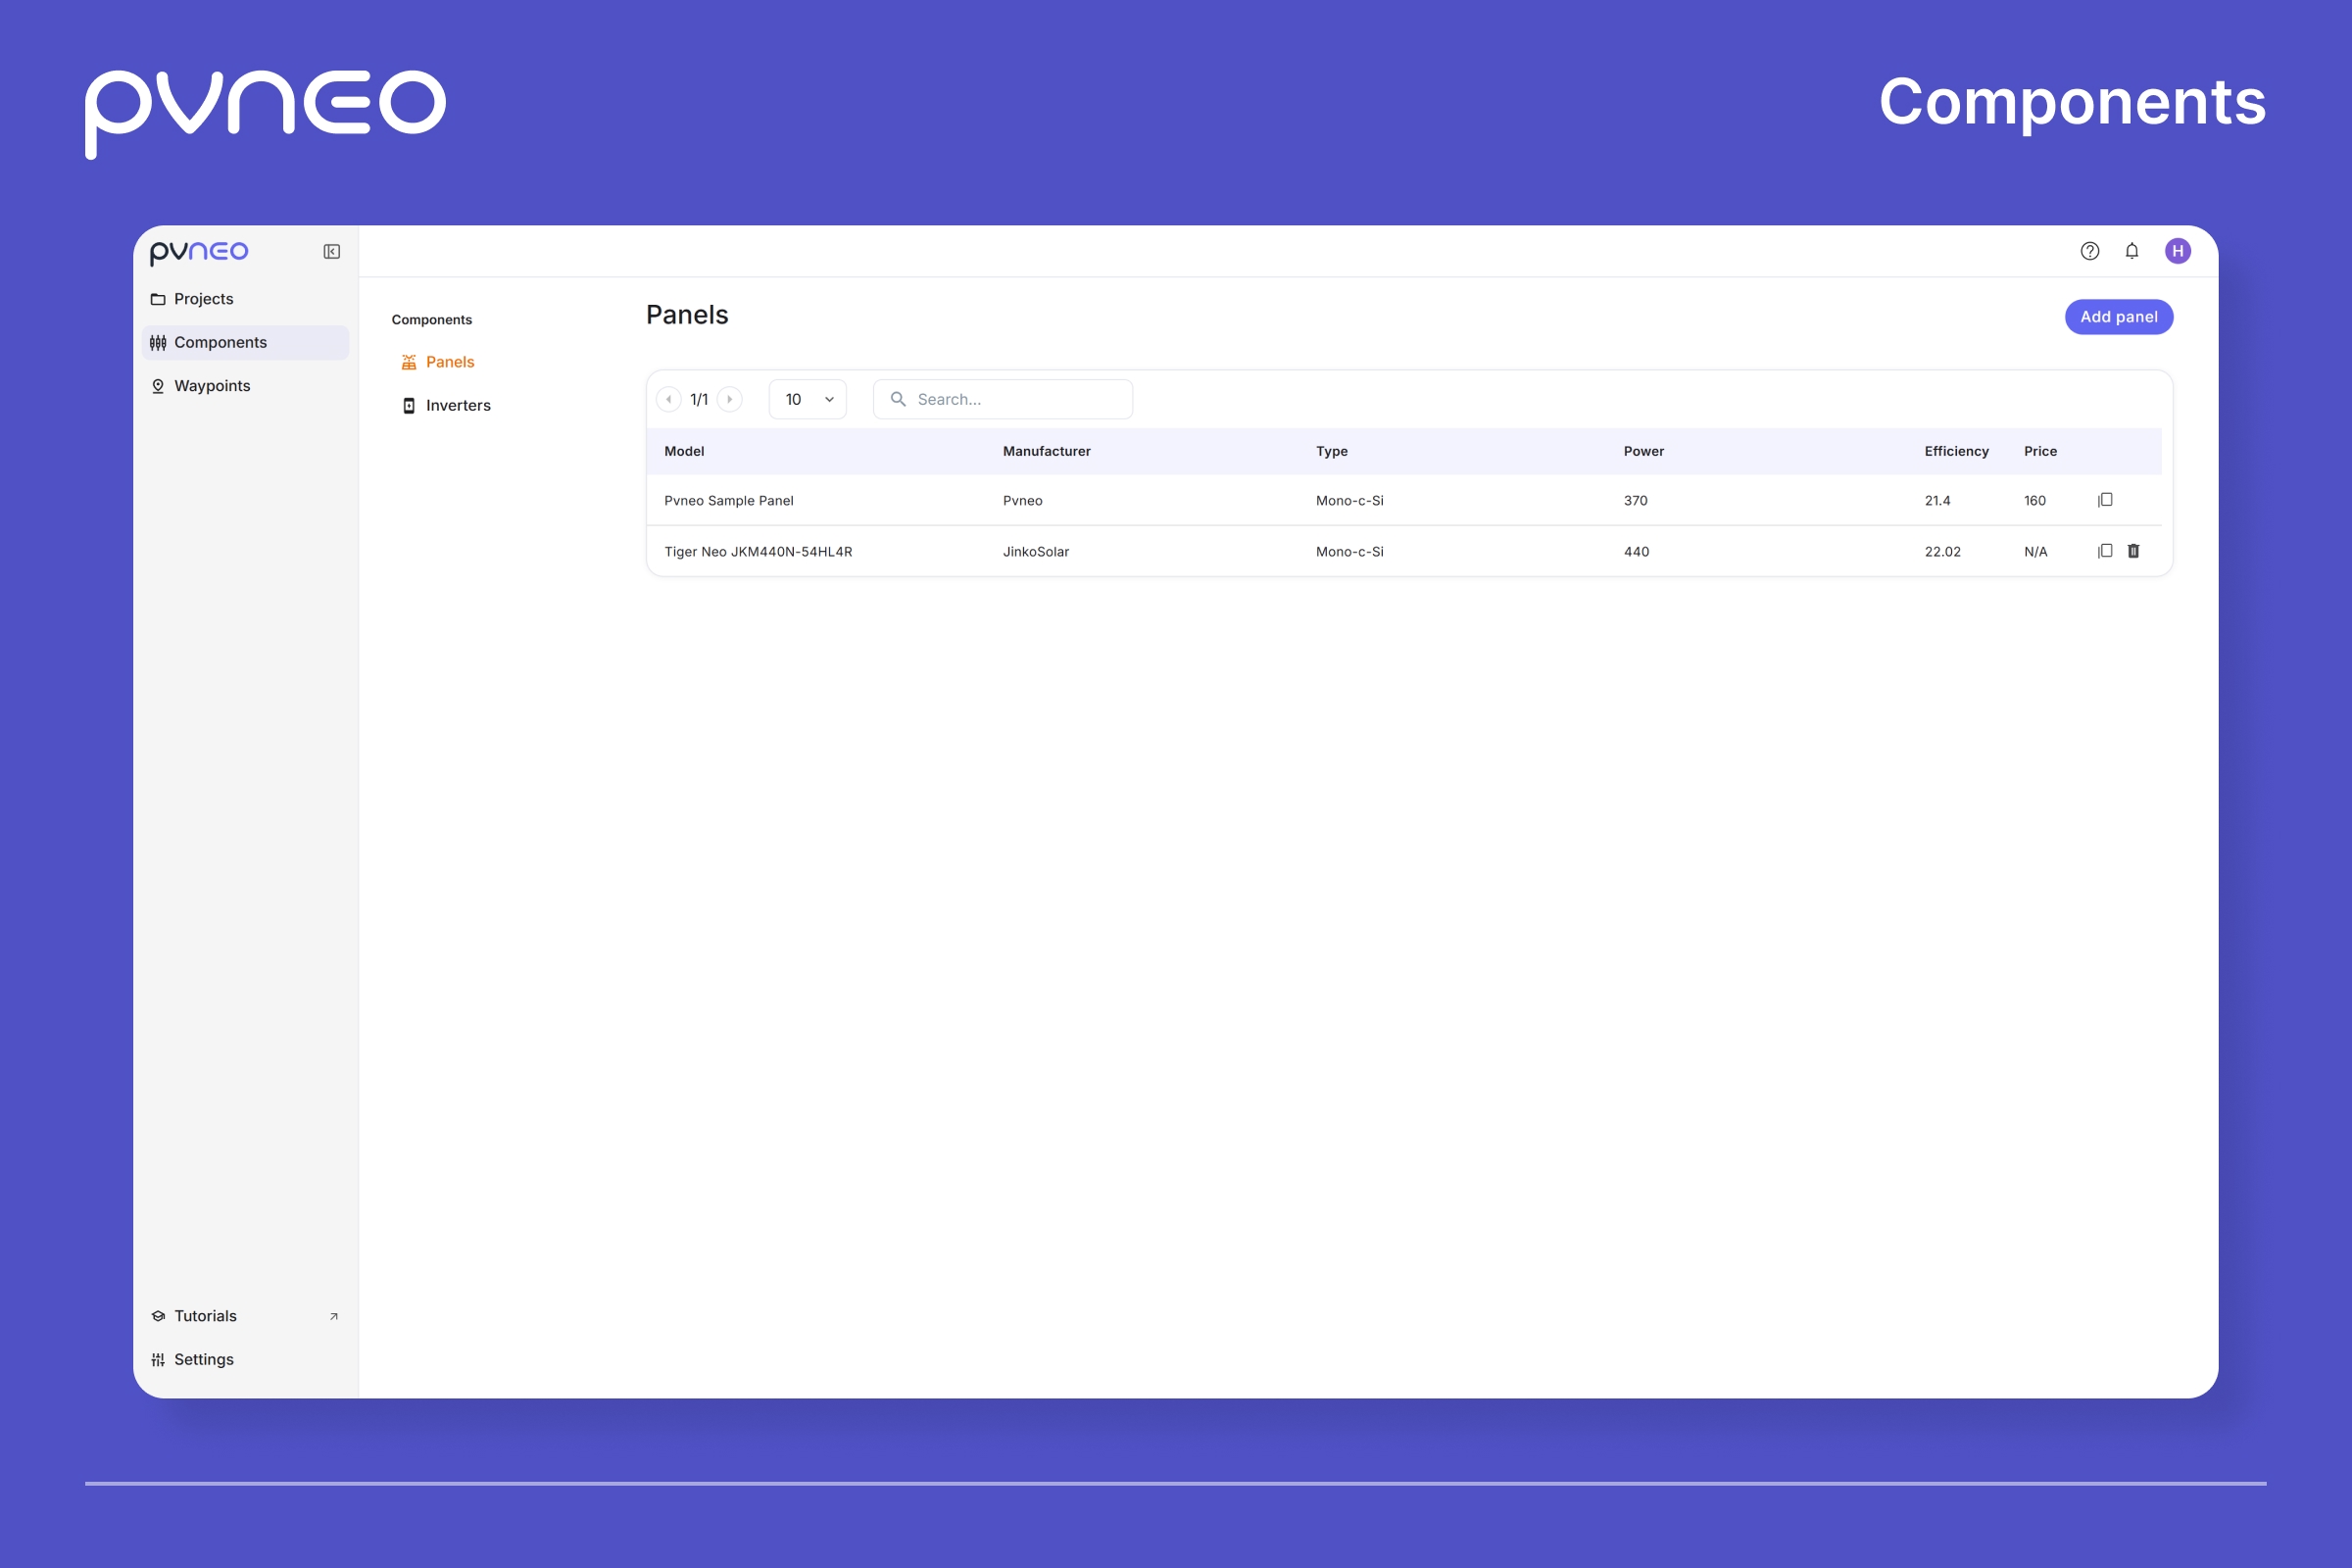
Components lives in the left menu, with two tabs: Panels and Inverters. This is your own library of equipment, whatever you add here is what you design with. To start with, there is just a sample panel and inverter, so let us add our own.
Step 2: Add a panel
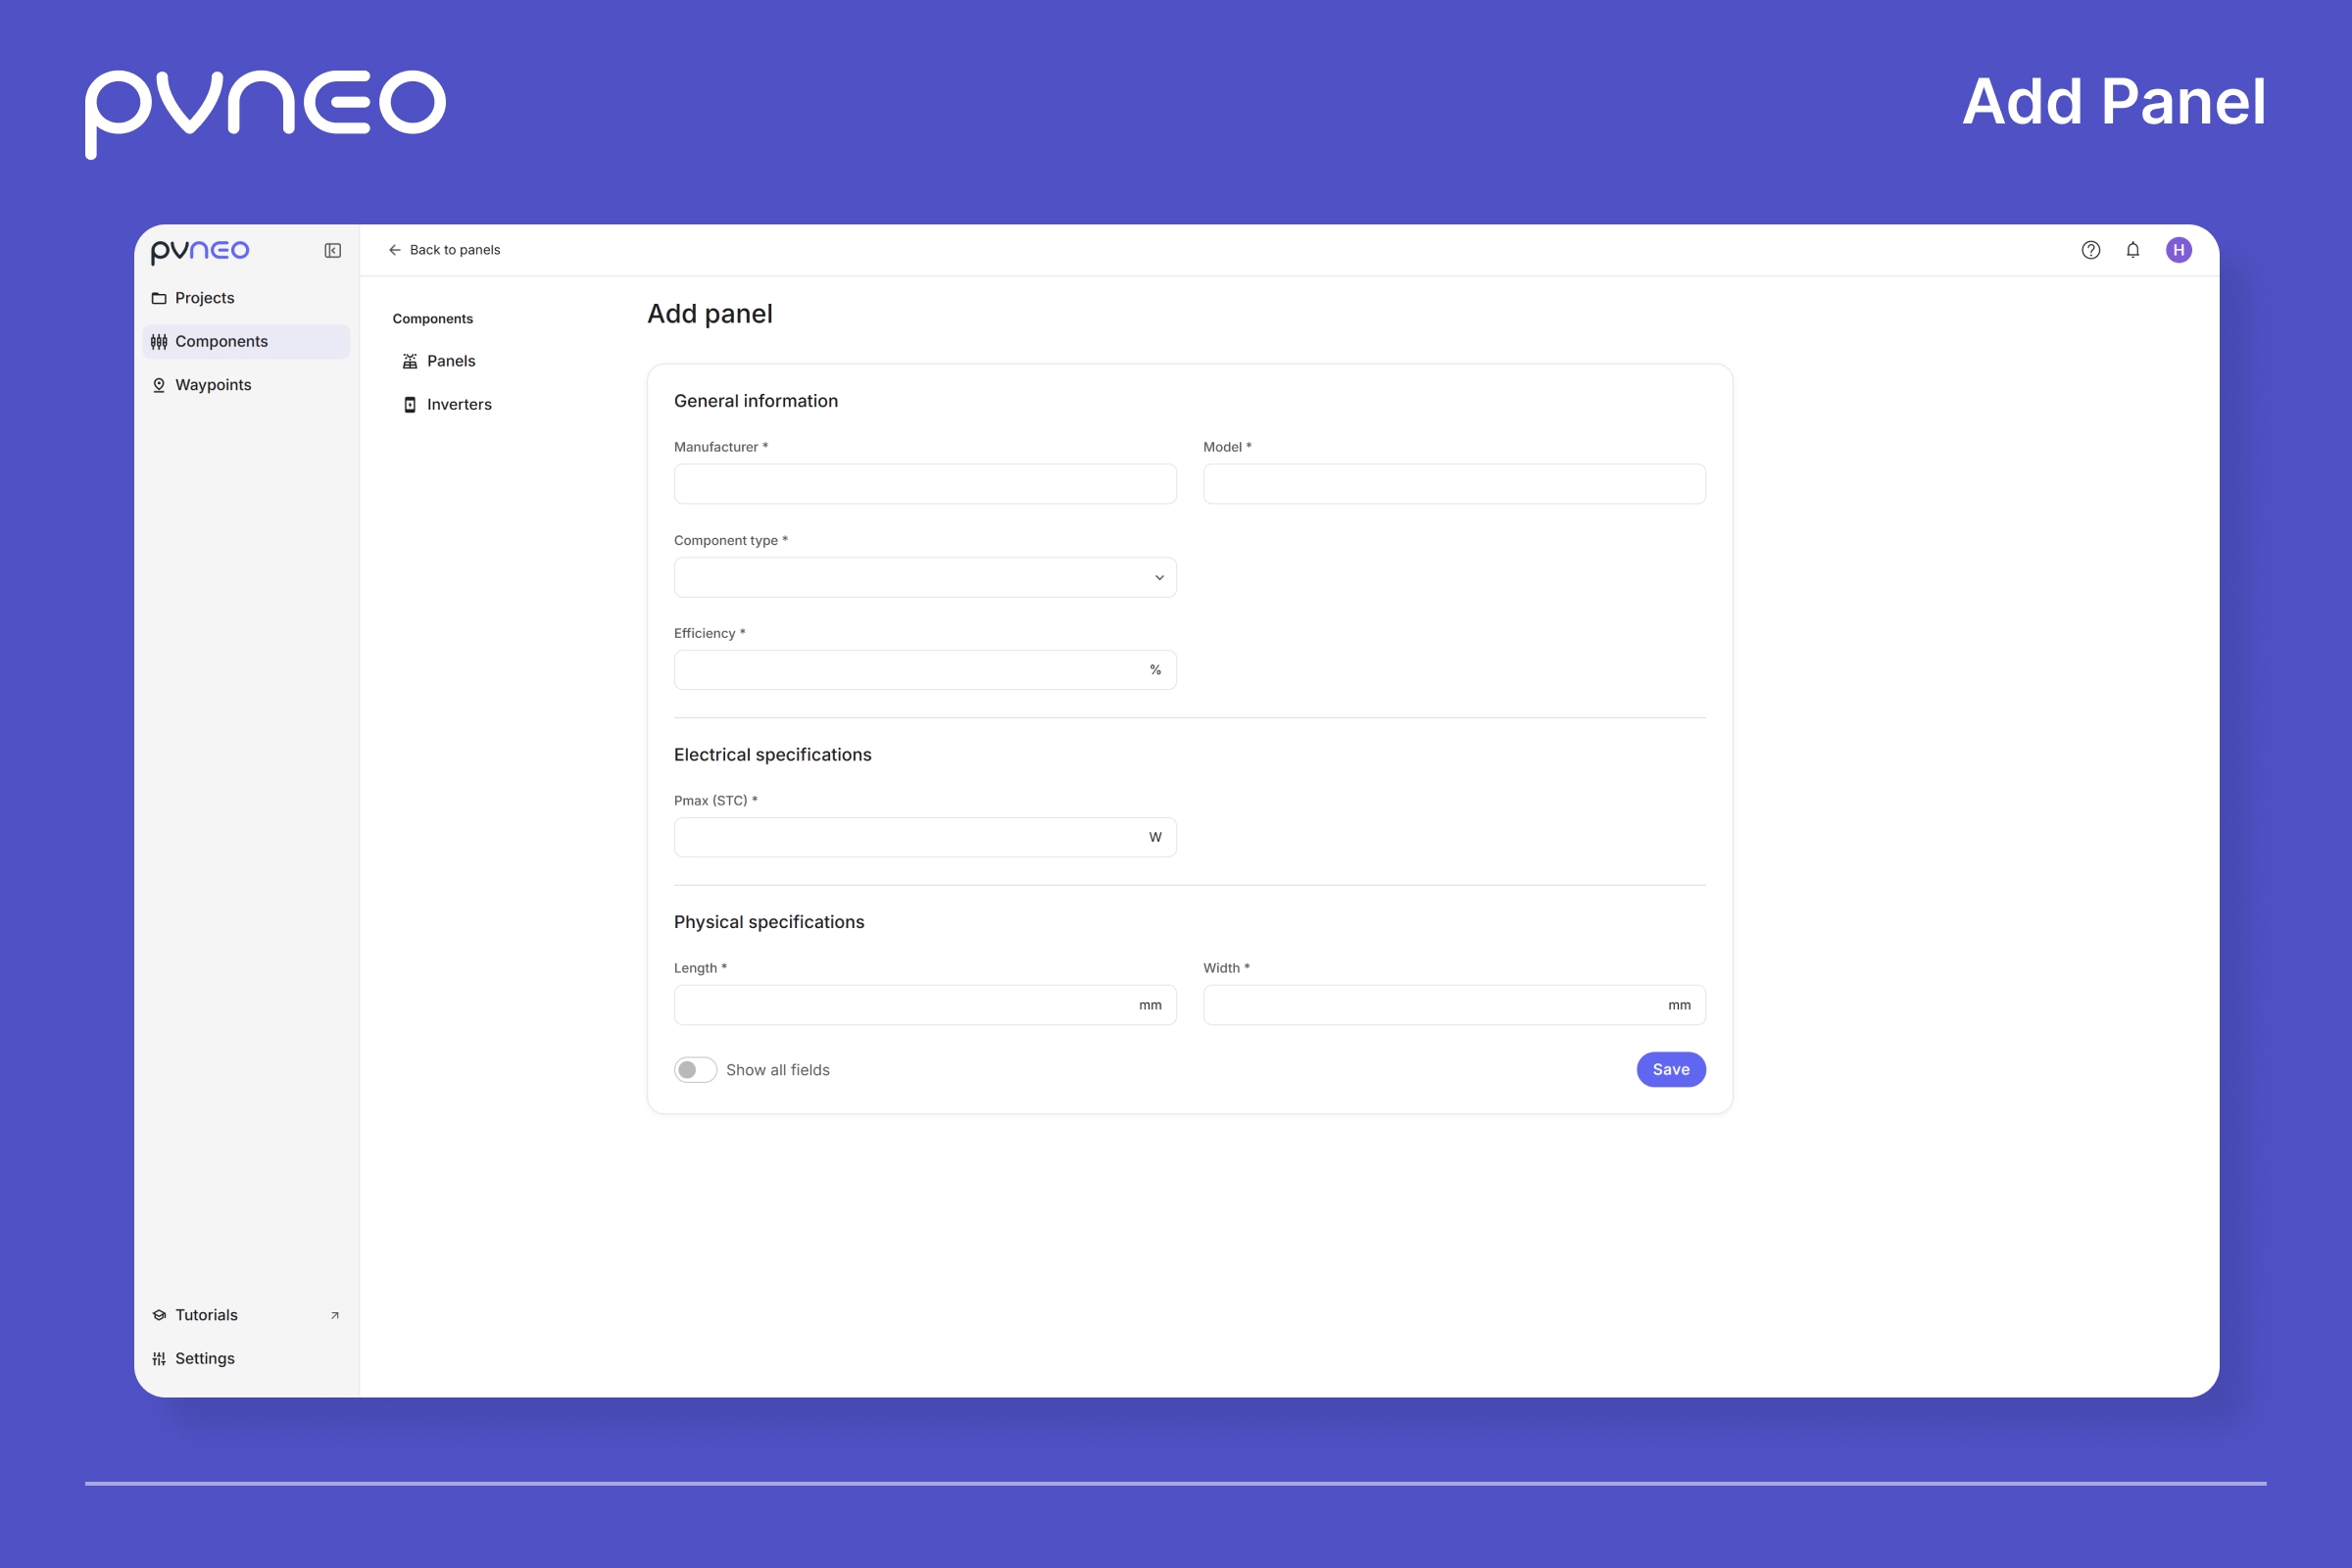
Click Add panel, and fill it in straight from the manufacturer’s spec sheet. You only really need the required fields, the ones marked with a star: the manufacturer, model, cell type, efficiency, power, and the panel’s dimensions. Copy those across and you are done. If you want to capture the full electrical detail, flip on Show all fields and the rest opens up, all straight off the same sheet. Then Save.
Step 3: Add an inverter
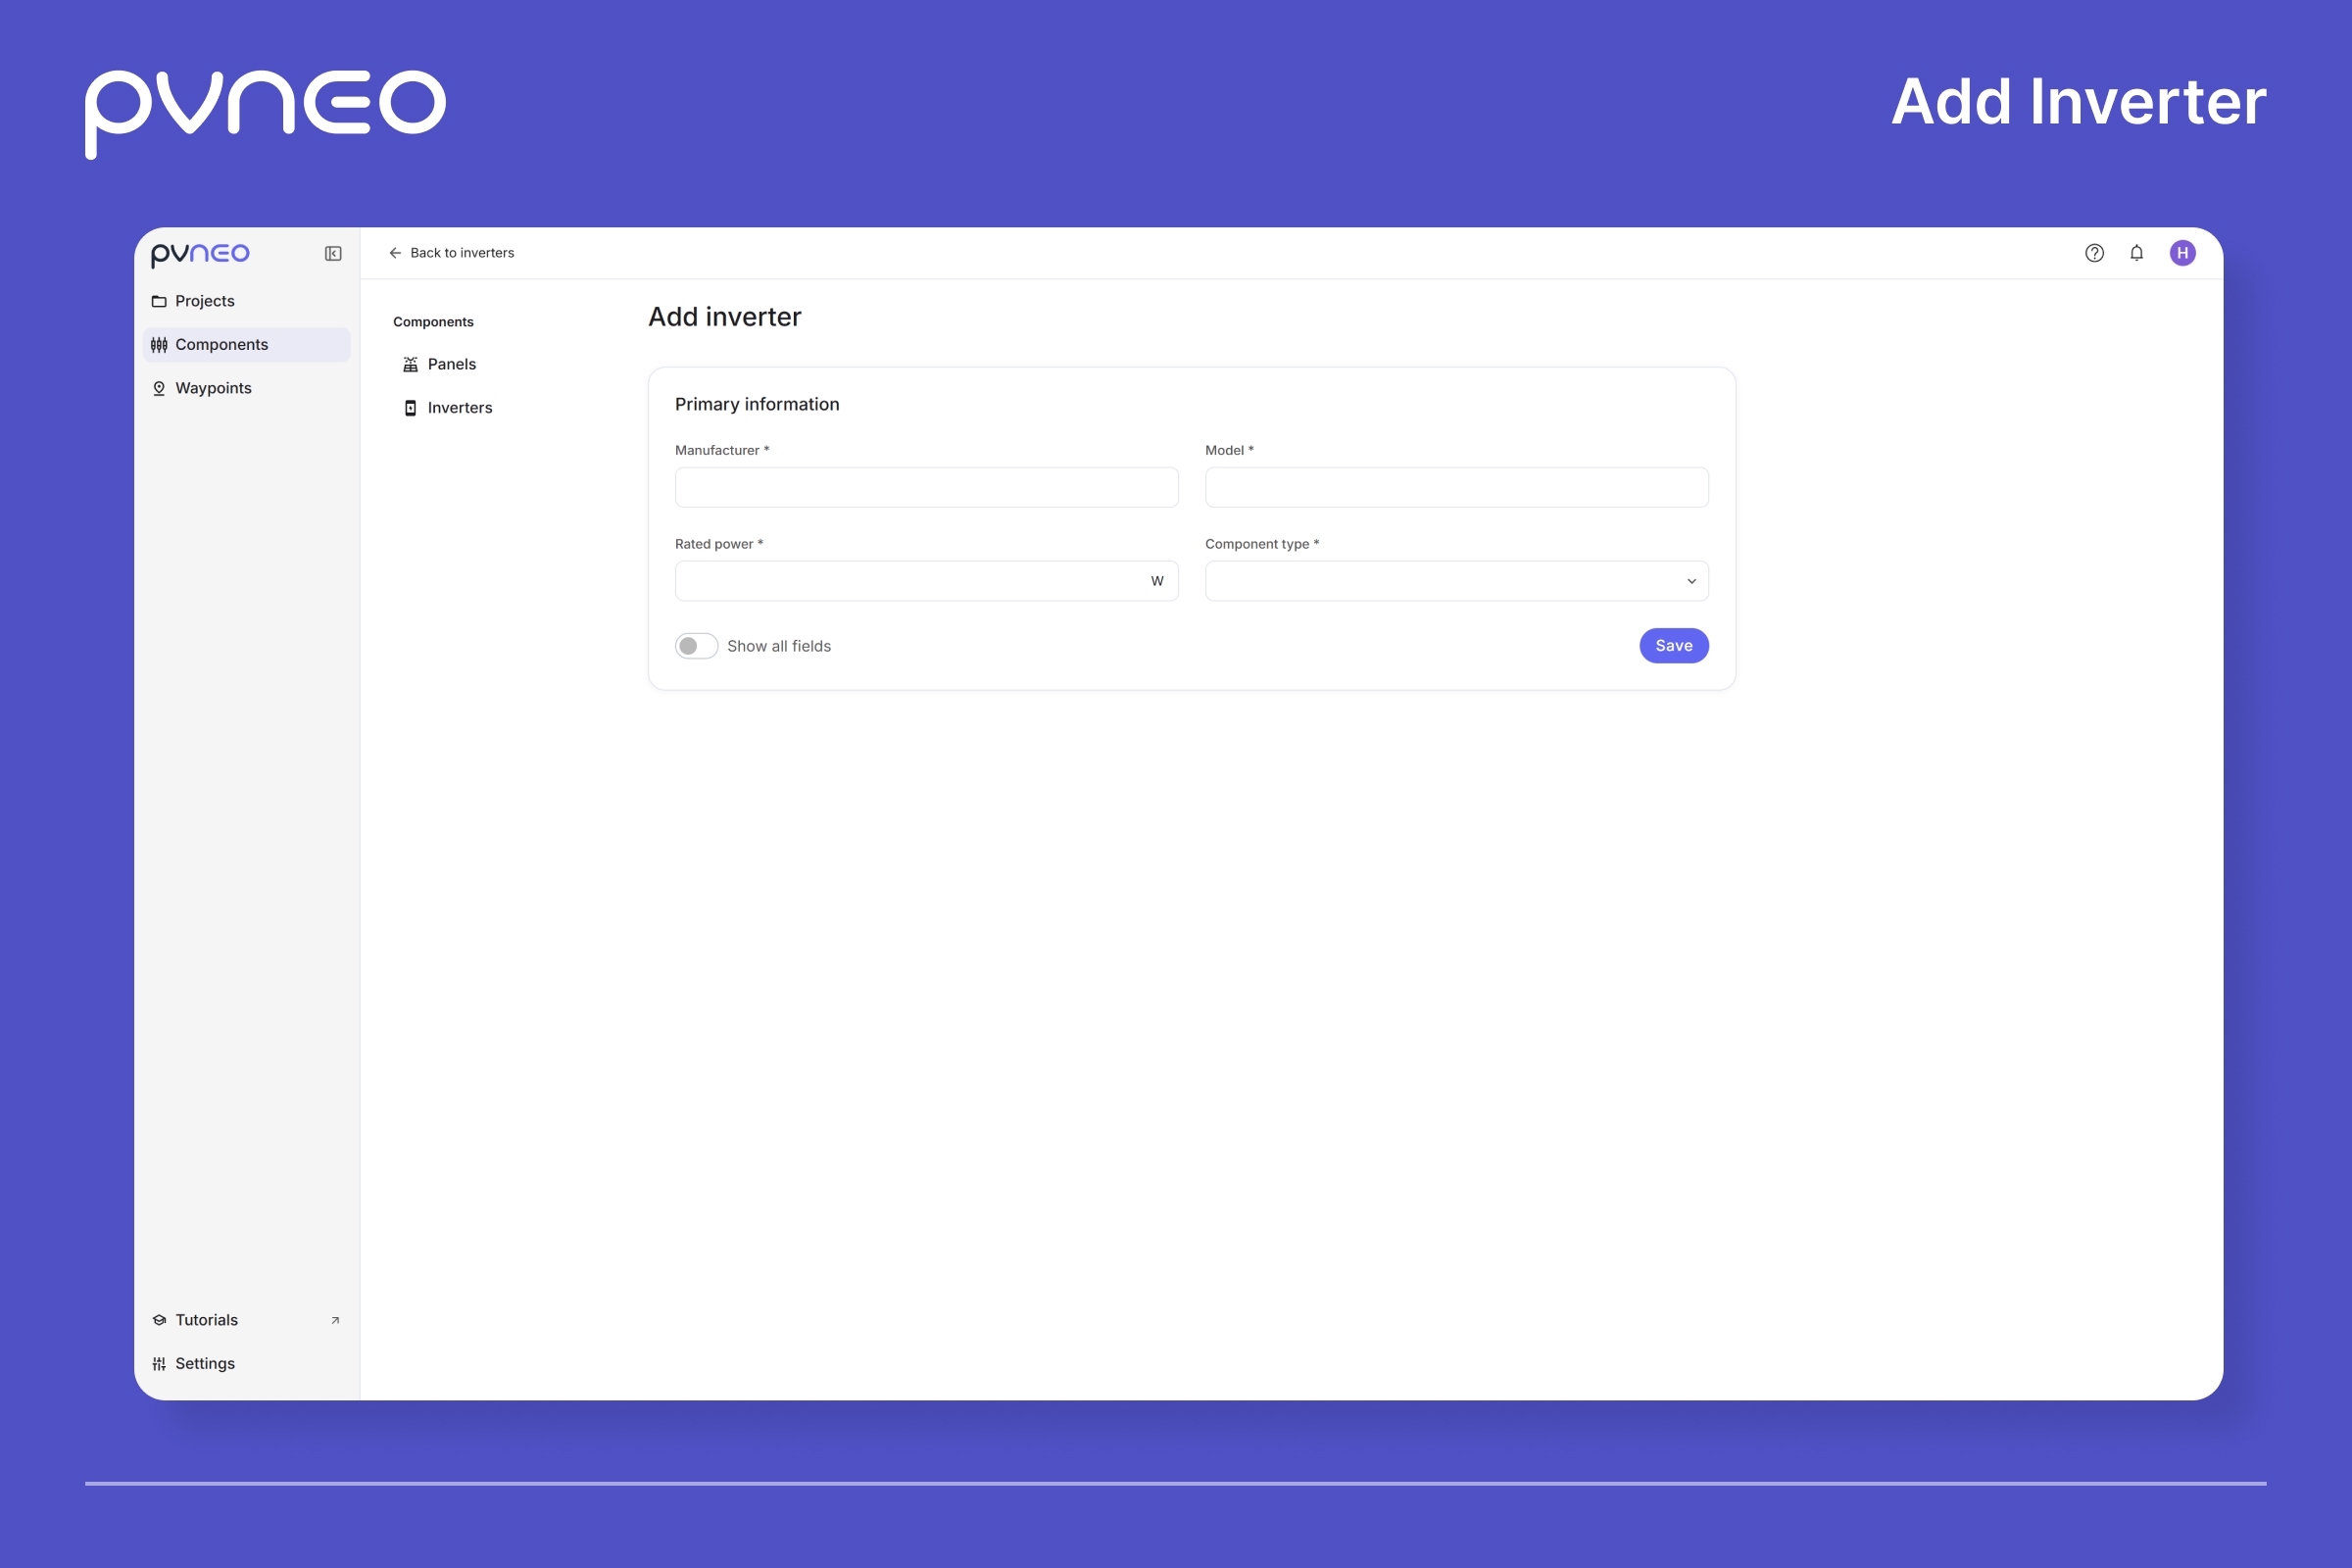
Inverters work the same way. On the Inverters tab, click Add inverter, and copy the required fields off its sheet, manufacturer, model, rated power, and type. Show all fields opens the rest here too, if you want the full detail. Save, and it is in.
Good to know
- Set it and forget it. Add the equipment you use once, and it is there in every project from then on.
- Build out your library with the panels and inverters you work with. Then you can put together a few designs for the same project at different price points, and give your customer options to choose from.