
Turn a finished design into a polished, client-ready proposal, cover, savings, environmental impact, project timeline, terms, and an interactive 3D model your customer can explore. This guide builds one page by page.
Step 1: Start a new proposal
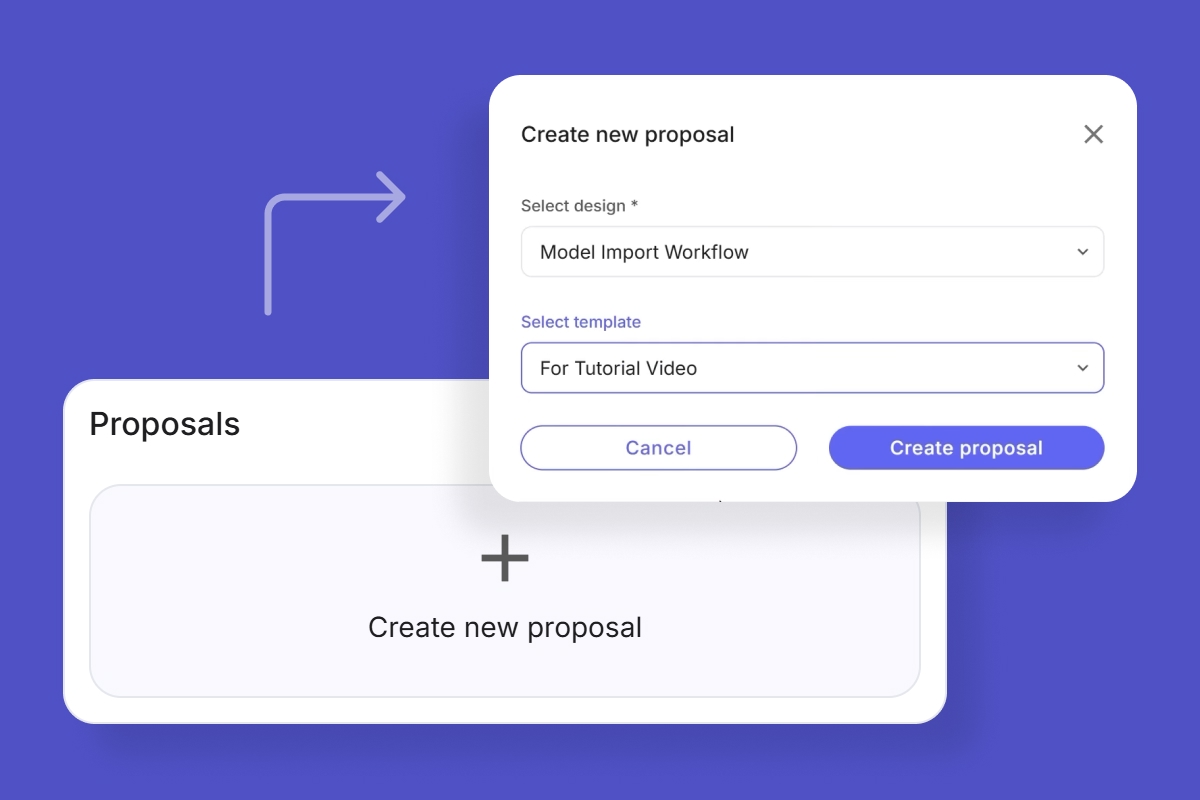
On the project Summary, click Create new proposal. Pvneo asks which design to build from and which template to start from. Pick your design, and a template if you have one saved, which pre-fills a lot of the fields. Then click Create proposal to open the proposal editor.
Step 2: Cover page
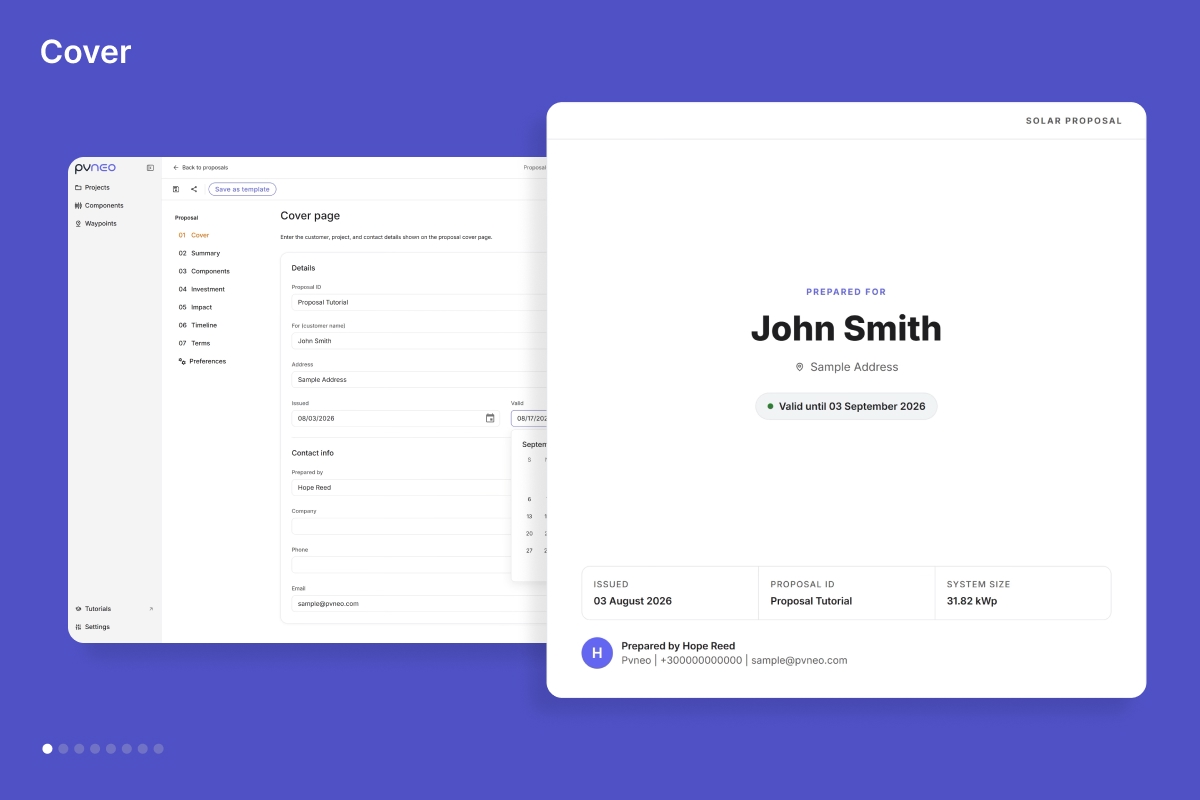
The editor opens on the Cover page. Much of it is already here: the customer's name and address carried over from the project, and your contact details from your user profile. Set the issued and valid dates, and add anything that is missing. Anytime you want to see how the proposal is shaping up, click Preview, which opens the live, client-facing version in a new tab.
Step 3: Summary page
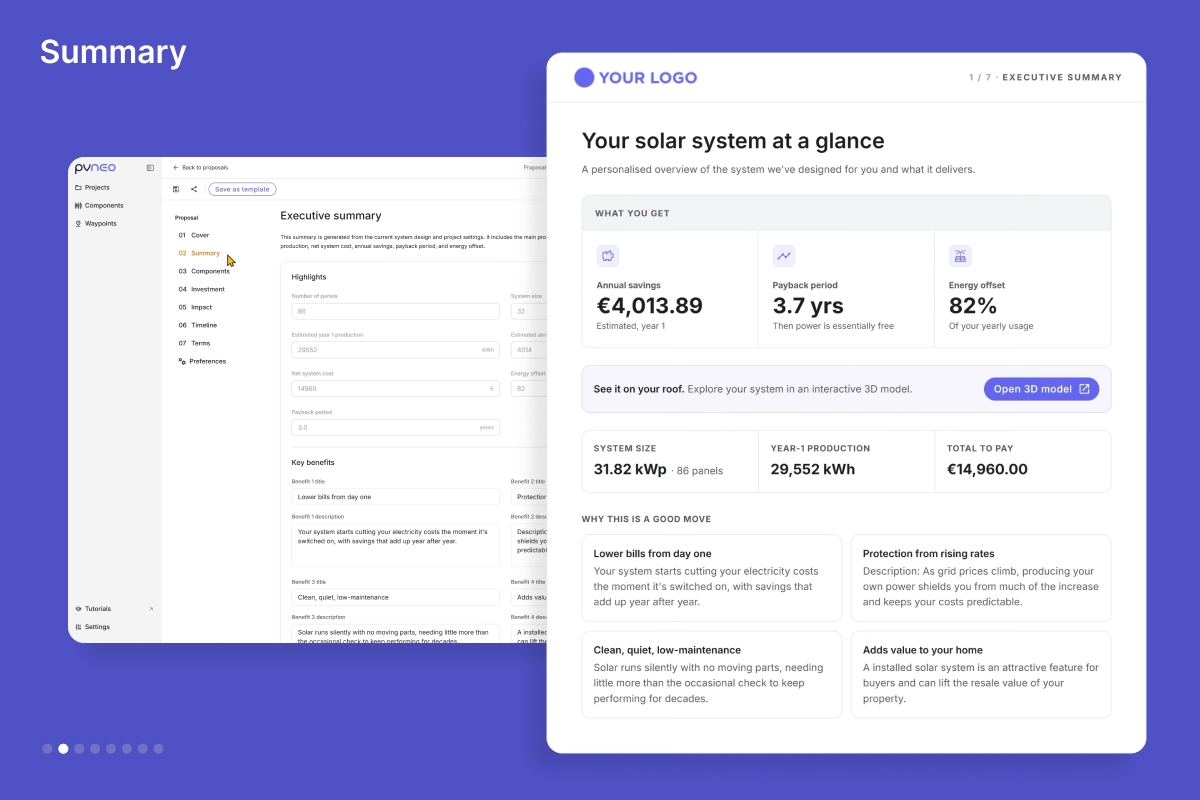
The highlights at the top, system size, production, savings, payback, are calculated automatically from your design. If they ever look empty, it usually means the design was not simulated, or the customer’s energy usage is missing; run the simulation in your design, and enter the usage in the project’s Energy tab. Below that, fill in the key benefits, the short selling points your customer sees. And here is a nice touch: right from the proposal, your customer can open the actual 3D model and spin the house around to see their system in place.
Step 4: Components
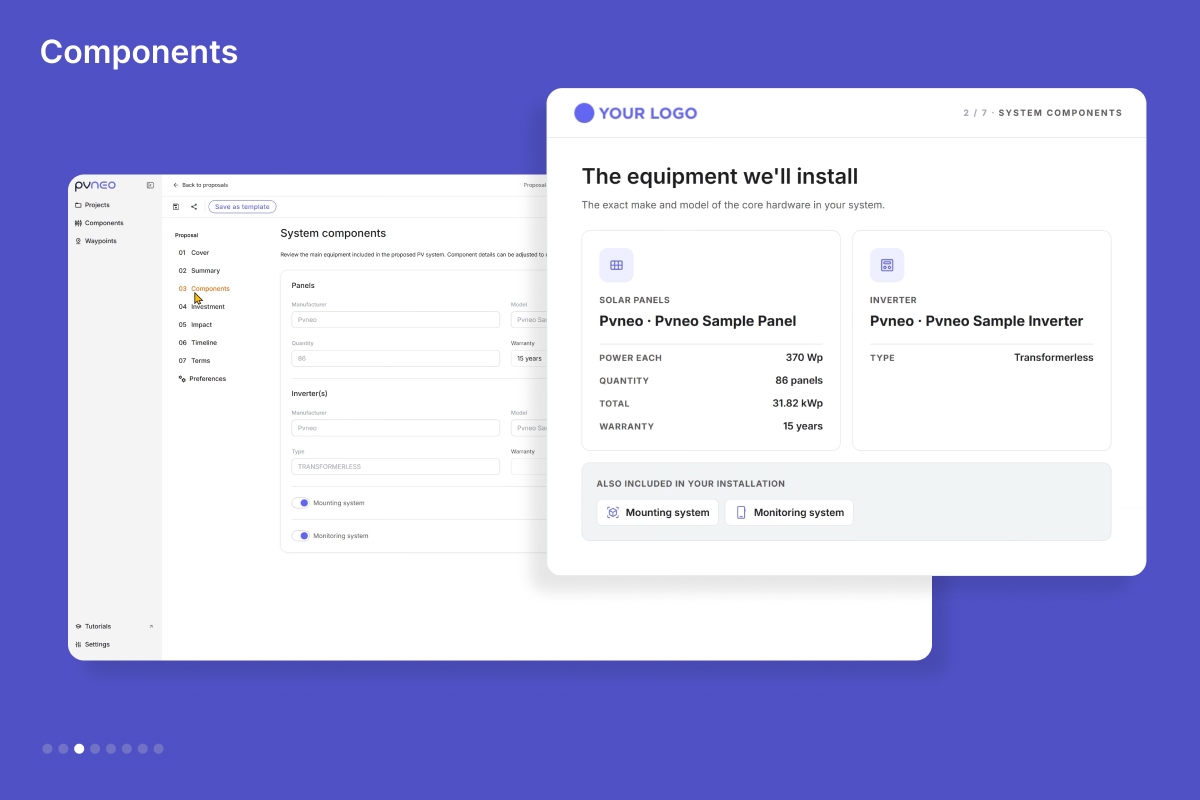
The Components page shows the panels and inverter from your design, and here you can enter the warranties you are offering on each.
Step 5: Investment
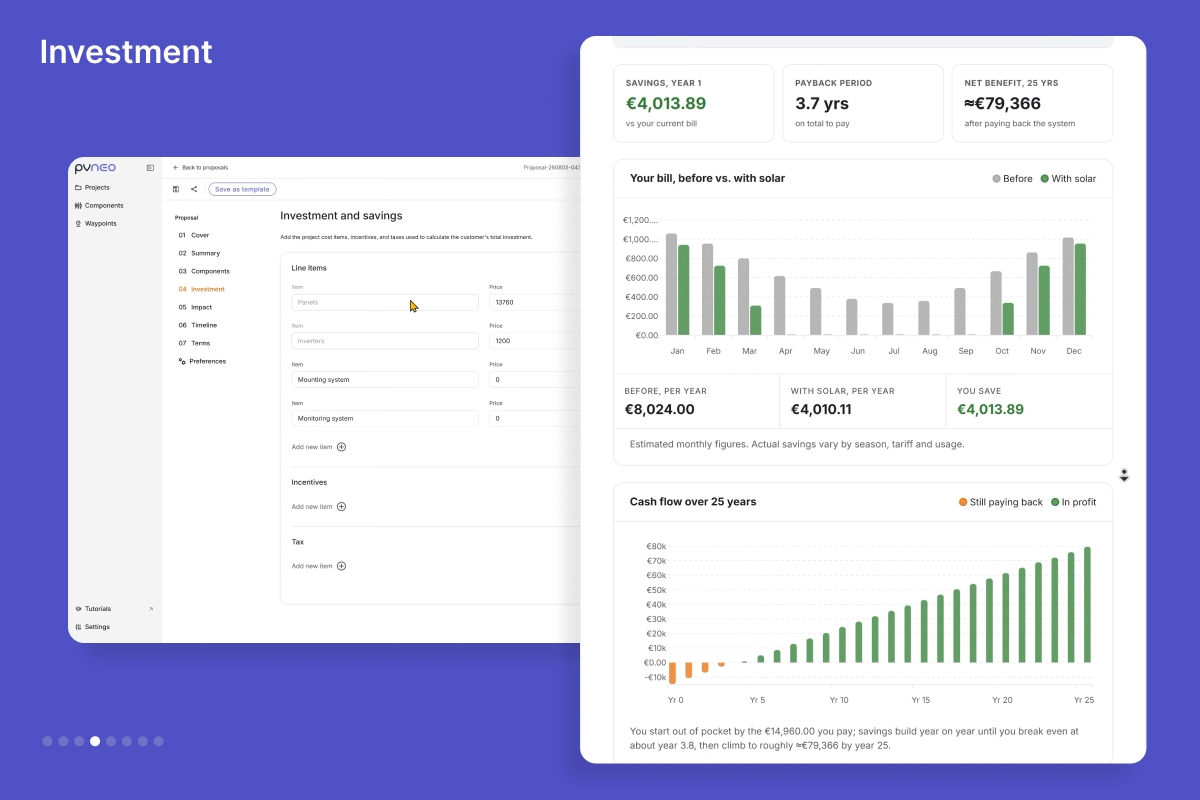
The Investment page is where the numbers come together. Set the price for each cost item, add any extra line items, and add incentives or applicable taxes. In the preview, the customer sees a clear cost breakdown adding up to their total, the savings in year one, how long until the system pays for itself, and the net benefit over 25 years, plus charts comparing their bill before and with solar, and the cash flow climbing into profit over time.
Step 6: Impact
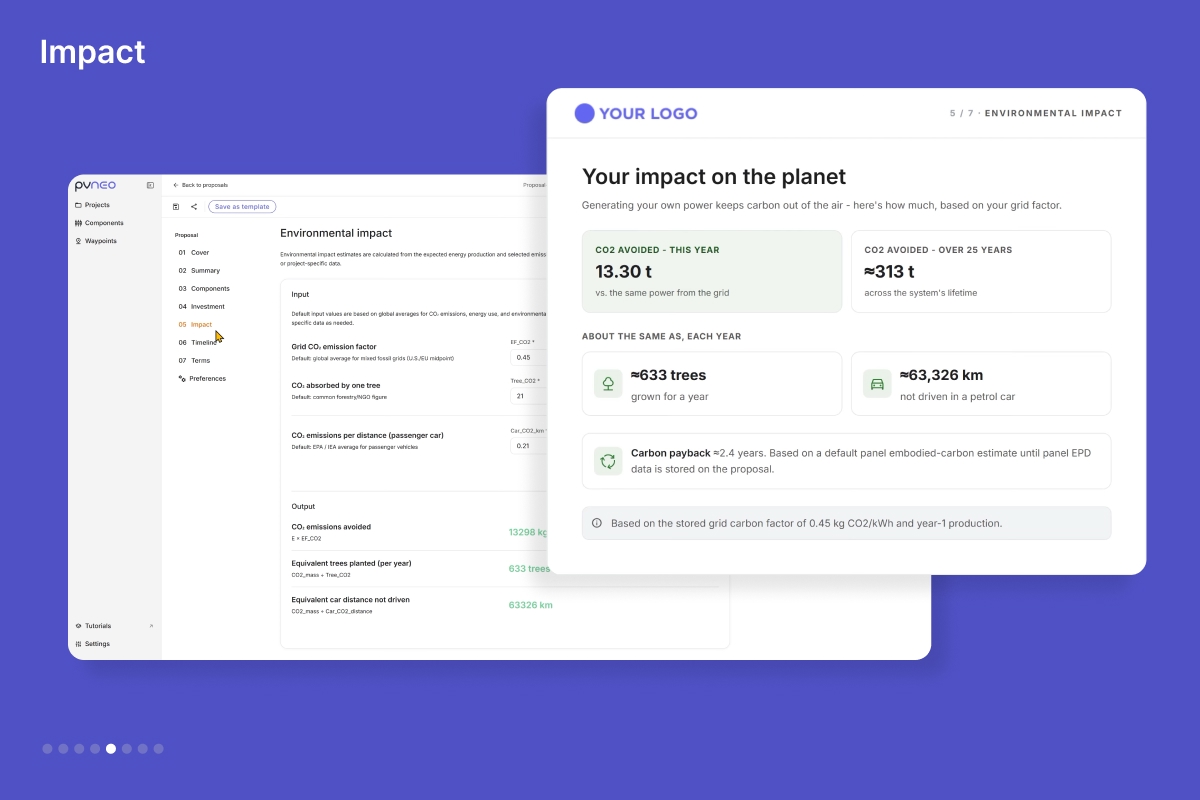
The Impact page is generated automatically. It estimates the carbon your system avoids, shown as relatable comparisons like trees grown or car kilometers not driven. You can adjust the underlying assumptions if you want, but out of the box it just works.
Step 7: Timeline
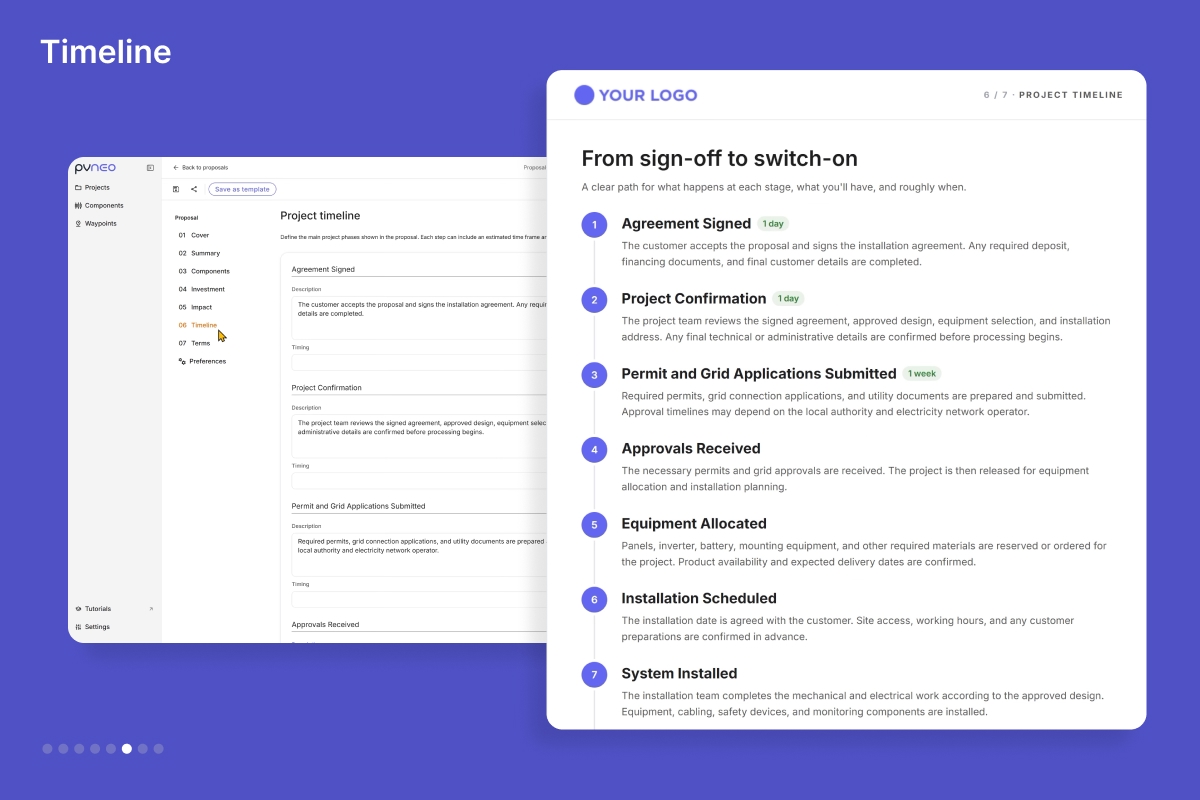
The project timeline lays out what happens after the customer says yes. Pvneo gives you a set of milestones to start from, and you can edit them, reorder them, or add your own, each with a short description and a rough time frame.
Step 8: Terms
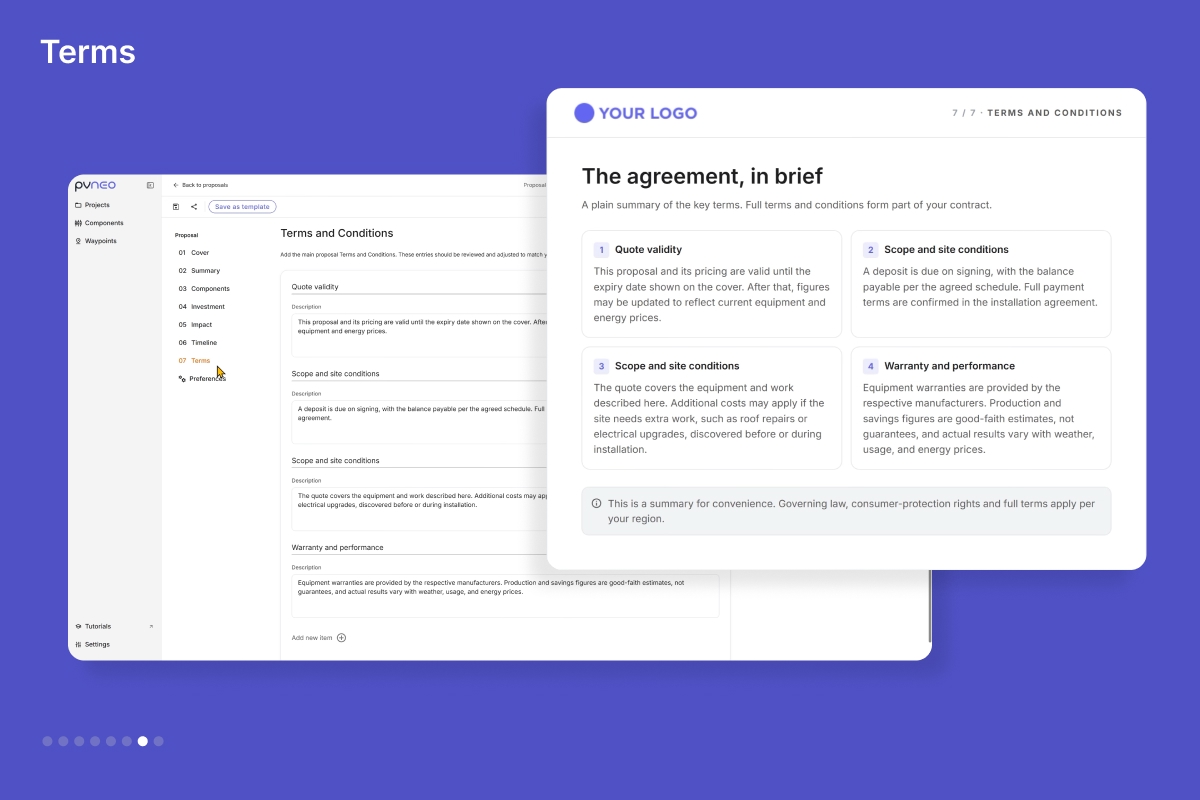
The Terms page is where you add your terms and conditions, each with a short title and description. These should reflect your own company’s process and local requirements.
Step 9: Preferences and sharing
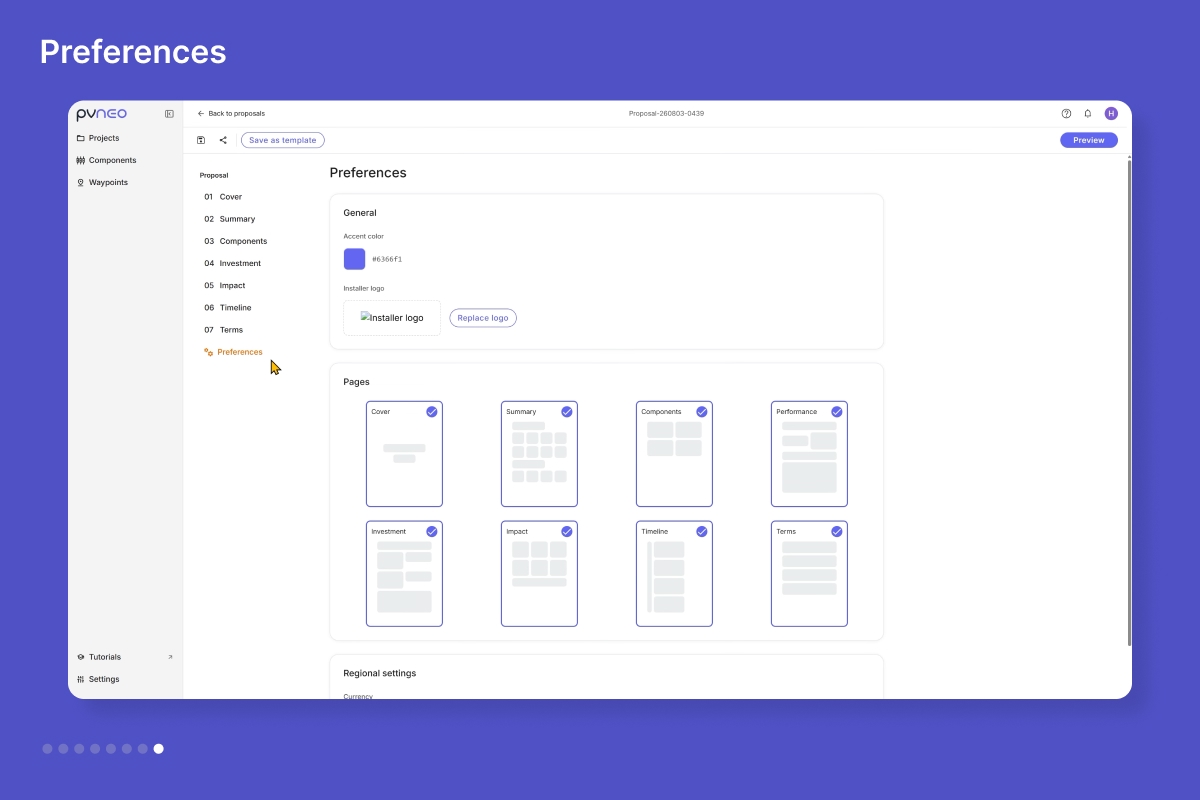
Preferences is where you brand the proposal: an accent color, and a spot for your logo. You can also toggle pages on or off to leave sections out, and set the currency. When the proposal is ready, two more things live in the toolbar. Share creates a public web link and copies it to your clipboard, ready to send your customer. And Save as template stores the reusable parts as a starting point, so next time you are not building from scratch.
With everything in place, take one last look at the finished proposal in Preview, the numbers, the charts, the interactive 3D model, the timeline, all of it, branded and ready to send.
Good to know
- Preview anytime. The Preview button shows the live client-facing version at any stage.
- Options help close the deal. Build a few designs for the same project and send proposals at different price points.
- Empty performance section? Run the simulation in your design and enter the customer’s energy usage in the project’s Energy tab.