
Pvneo Waypoints is a mission-planning workaround for the latest consumer-grade DJI drones. Plan an automated flight in Pvneo, load it onto your controller, and fly a repeatable path that captures a clean, photogrammetry-ready photo set, for Pvneo’s own photogrammetry workflow, or for processing in the software of your choice.
Understanding the three flight types
There are three kinds of flight you can plan, and which one you reach for depends on the roof:
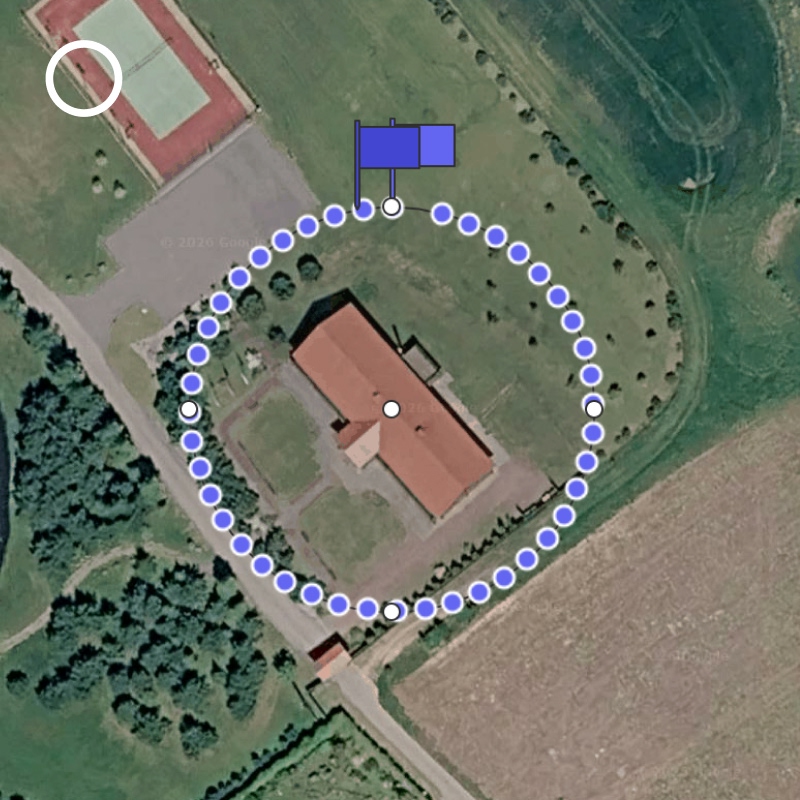
- Orbital circles the subject with the camera pointed inward. It is your go-to for small residential roofs, one quick loop that captures the roof from all around. Adding a few orbits to a single grid mission also helps avoid the bowing effect photogrammetry can get on larger area scans.
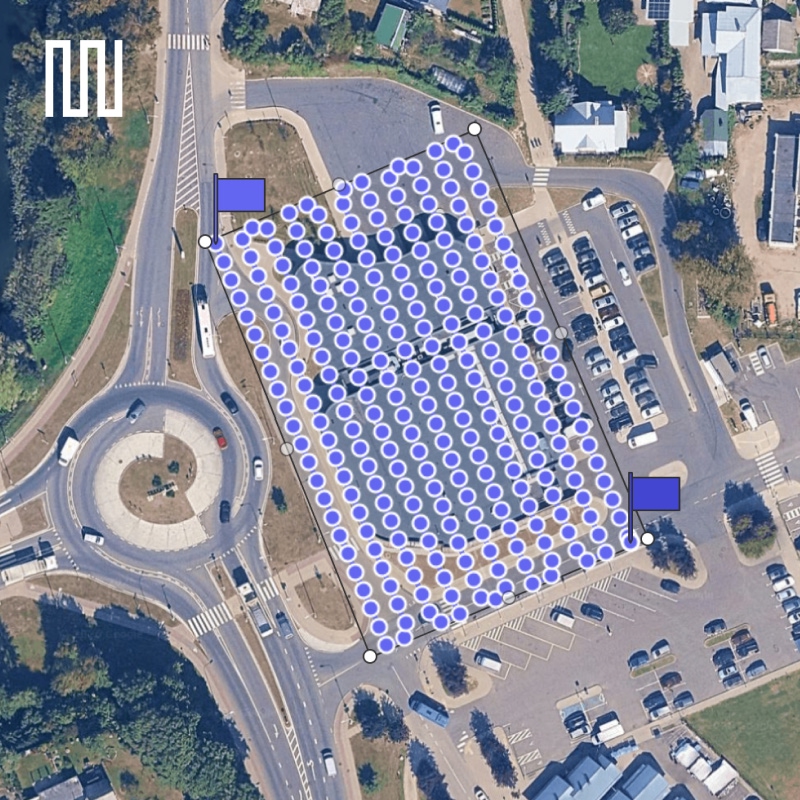
- Single grid flies straight back-and-forth passes, typically with the camera pointing down. That top-down coverage suits larger roofs and bigger areas.
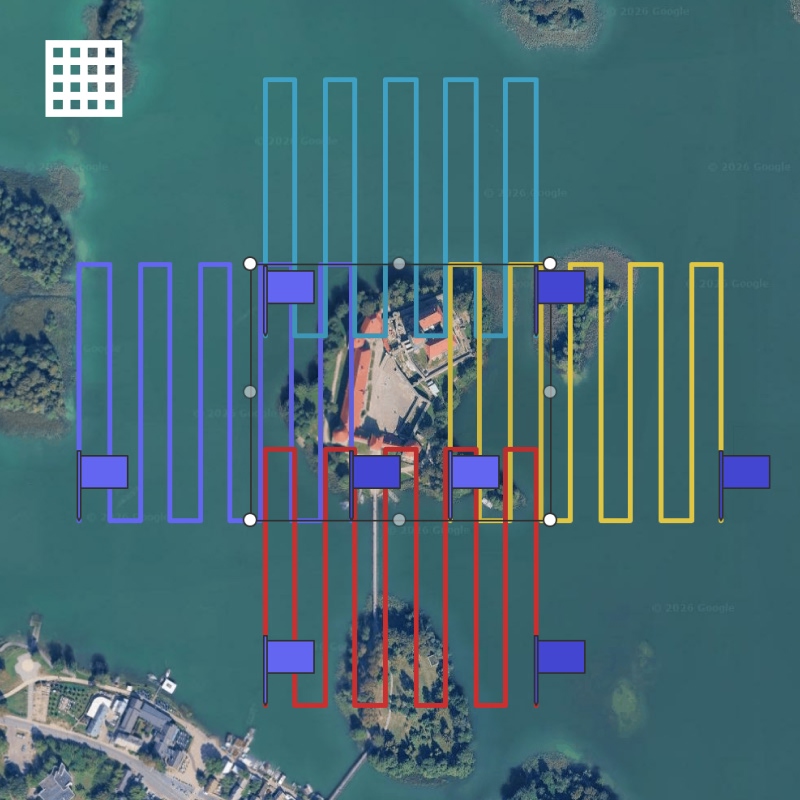
- Multi grid adds passes from multiple directions and is the most demanding flight type. It is for more complex geometry and better vertical surfaces, walls, roof edges, chimneys, facades, and it fills in hidden spots, since what is blocked from one direction is often visible from another.
You can even combine missions for the best results, different flight types together, and even mix in some manual flying where you need it.
The key settings
- Photo interval is how often the drone takes a shot, and it sets the flight speed, more frequent shots mean faster flights. Slow the mission down to avoid motion blur when flying close to the subject or in poor light. Keep your interval in mind: you will need to match it on the drone in timed-shot mode when you fly.
- Flight height is measured from where you take off, not from the ground below the roof, so pick your takeoff spot with that in mind, or adjust the height accordingly.
- Overlap is how much each photo shares with the next; eighty percent is a safe, reliable default that gives photogrammetry the common detail it needs to stitch the model together cleanly.
- Overlap height offset corrects for height: overlap is calculated at ground level, but higher up on a roof it ends up lower than the number says, so this setting keeps the overlap holding where the roof actually is.
Step 1: Plan your flight
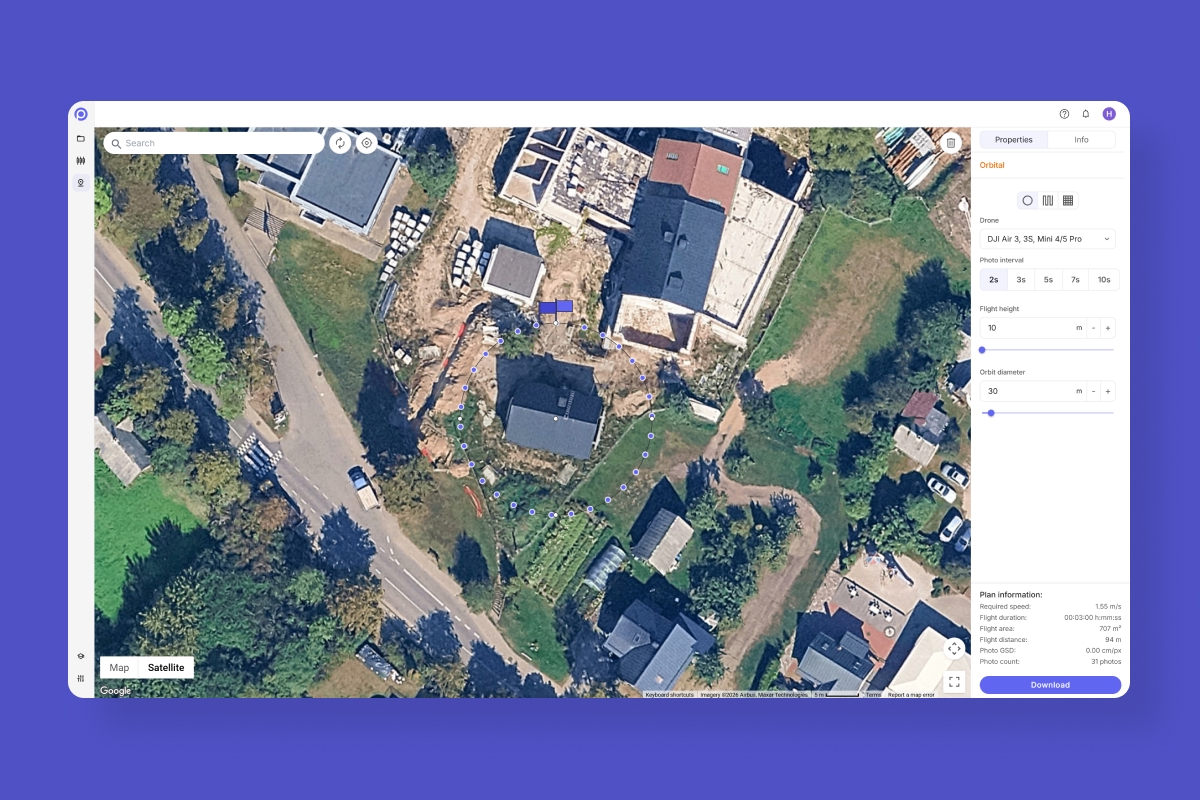
Choose the flight type you need, orbital, single grid, or multi grid, and the planning works the same for each. We’ll use an orbital flight as the example here. Select your drone, set the photo interval and flight height, and draw the flight over the area you want to scan, adjusting its size or shape as needed.
Before downloading, take a look at the plan information. The required speed tells you how fast the drone needs to fly, so make sure it is something it can comfortably hold in the light you will have. And the flight duration tells you how long the mission takes, so you know you have the batteries for it. When everything looks right, download the file.
Step 2: Create a placeholder flight on the controller
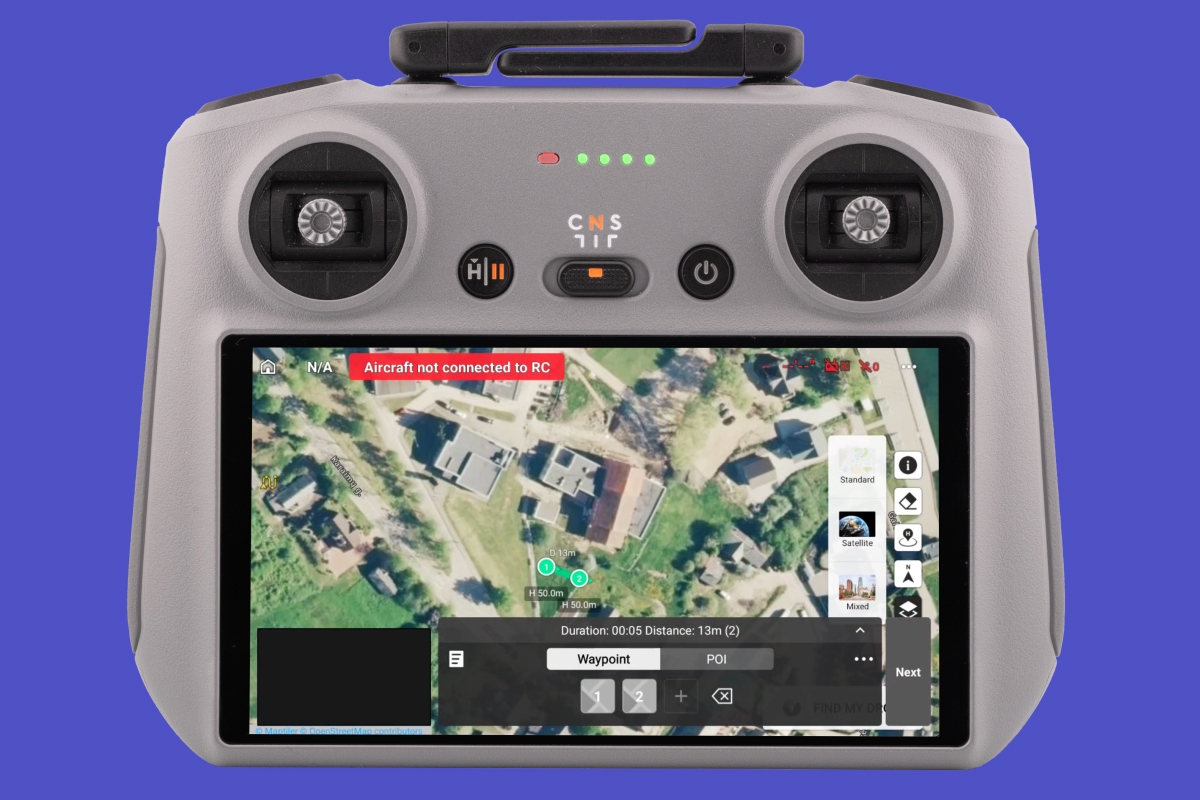
This is where the workaround comes in. Before that file is any use, create a placeholder mission on the controller, an empty flight to swap your downloaded one into. Using a DJI RC2 controller and the DJI Fly app: turn on the controller, select connect to aircraft, then tap the camera view in the top right, which gets you into the camera interface without actually connecting to a drone. Open map view. It is worth zooming in to your actual location and switching to satellite view, so the mission’s thumbnail shows the real place and is easy to spot later. Then click the waypoint icon on the left, drop a couple of waypoints on the map, click the waypoint icon again, and choose save and exit.
Step 3: Swap in your Pvneo flight
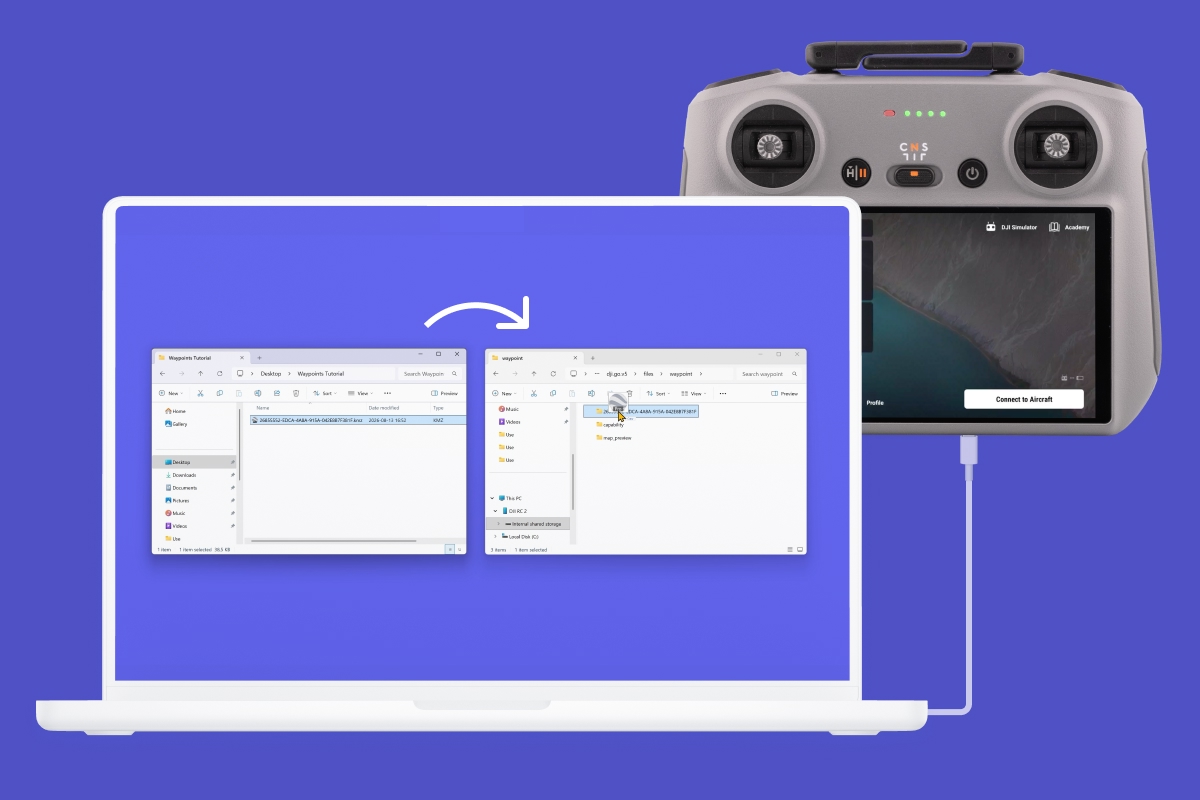
Connect the controller to your computer with a USB cable (it needs to be turned on for its storage to show up). Open two windows: your downloaded flight in one, and the controller’s storage in the other. In the controller’s storage, follow the path to the waypoints folder. Each mission sits in its own folder, and inside is a file with that same name. Copy the placeholder mission’s folder name, and rename your downloaded file to match it, so the controller recognizes it as that mission. Then drag your renamed file into the placeholder mission’s folder and choose copy and replace, overwriting the file already in there.
Step 4: Fly the mission
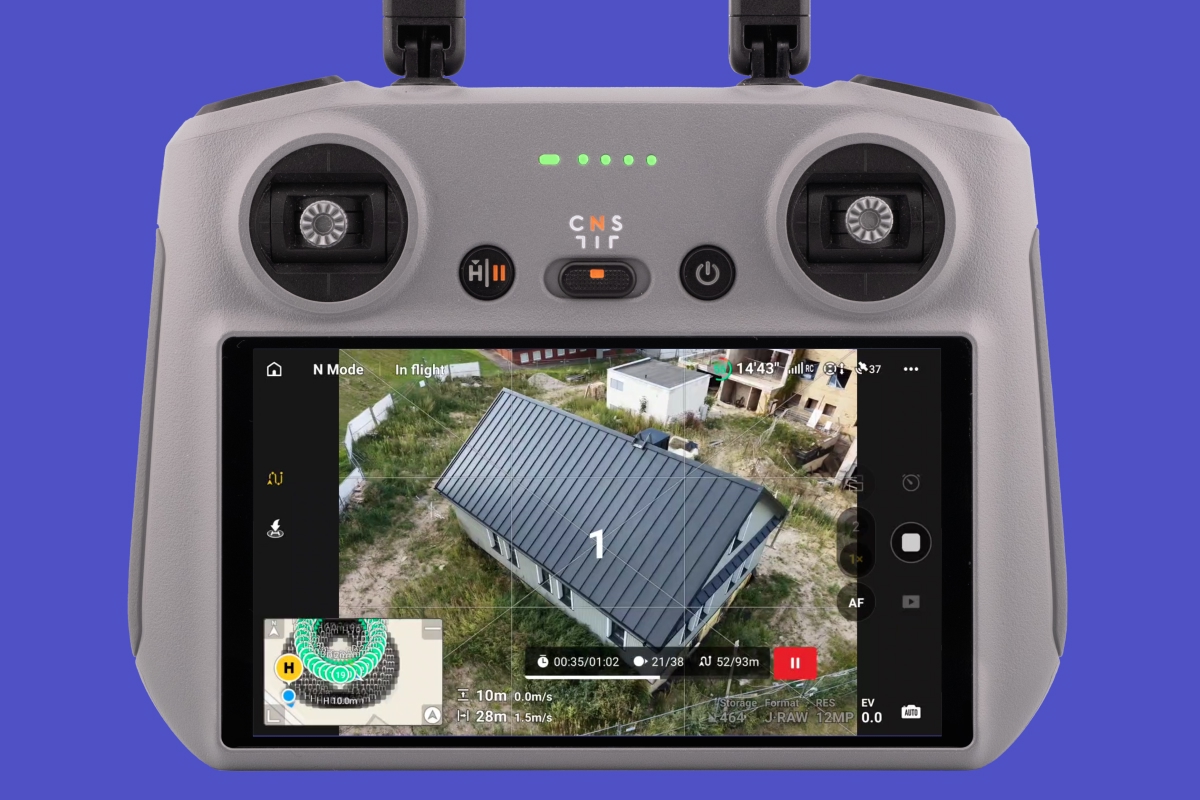
Out on the field, with the drone powered on and the controller connected, we recommend flying the drone close to the site manually first and starting from there, rather than trusting obstacle avoidance to get it across. Tap the waypoint icon, open the list of missions, and pick the one you planned. Turn on timed-shot mode and set the same photo interval you chose in Pvneo. To launch, tap Next, then the green go button. When the drone reaches the start point and faces the subject, adjust the camera angle with the scroll wheel, then hit the shutter to start the timed shots. When the orbit is finished, stop the timed shots and bring the drone home.
A note on capture: shooting JPEG plus RAW gives you options. A lot of the time the JPEGs are enough, but in high-contrast scenes, a dark roof under bright sun, deep shadows against a light background, the RAW files let you lift shadows and pull back highlights, bringing out detail photogrammetry needs to reconstruct cleanly.
Good to know
- Combine flight types and manual flying for the best coverage on complex sites.
- Match your photo interval on the drone in timed-shot mode when you fly.
- Shoot JPEG plus RAW so you have room to recover detail in high-contrast light.